How to Use Kling AI Motion Brush for AI Videos in 2025
Share to:
Think about turning a still picture into a moving one. The Kling AI motion brush helps you do this easily.
In 2025, Kling AI has become popular for creating short AI-generated video clips from single pictures. This article will explain what the Kling AI Motion Brush is, provide a step-by-step guide on how to use Kling AI Motion Brush, share advanced tips for realistic results, and discuss Dreamlux – a top Kling AI alternative for AI video generation.

Contents
What is Kling AI Motion Brush?
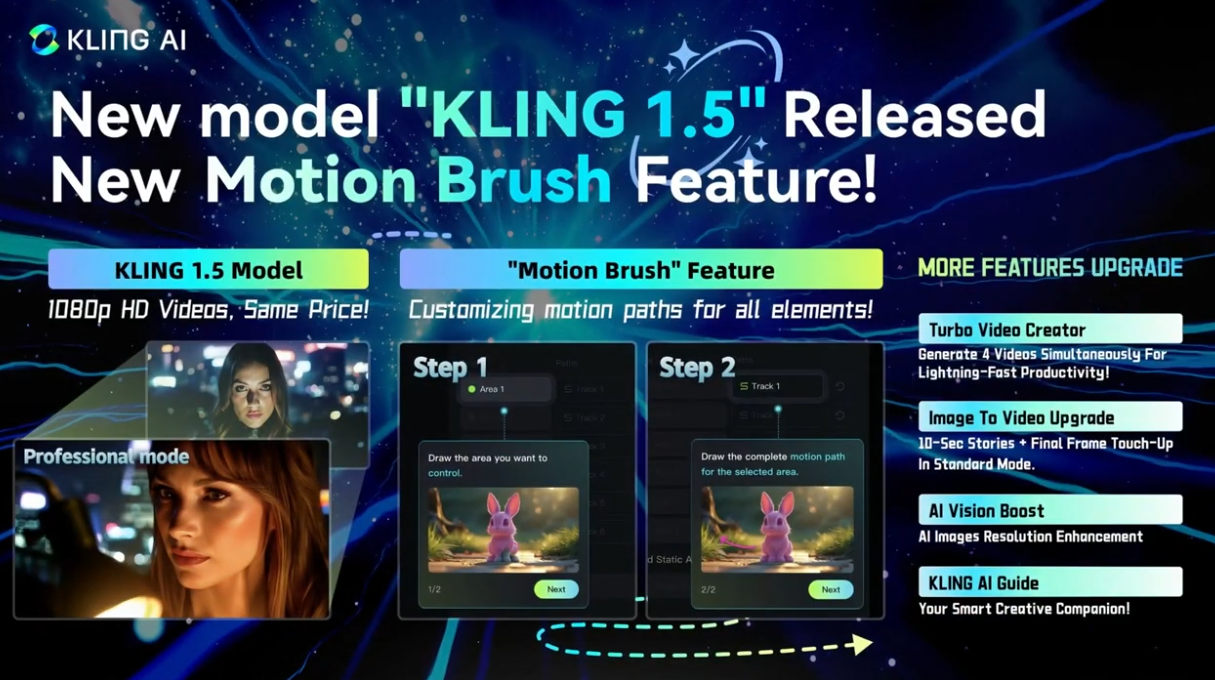
The Kling AI Motion Brush is an innovative animation tool designed to convert static images into dynamic, realistic videos by adding motion to selected elements.
Featuring an intuitive interface, it allows users to effortlessly draw motion paths directly on their images. Its smart auto-detection simplifies the animation process, making it user-friendly for beginners and powerful enough for professionals.
Advanced customization options include adjustable brush sizes, a Static Brush to keep specific elements stationary, and the capability to animate multiple parts simultaneously. These features provide enhanced flexibility, enabling users to create highly realistic, personalized animations easily.
Whether for personal projects or professional use, this tool can make your content better and grabs attention.
How to Use Kling AI Motion Brush: A Step-by-Step Guide
Using the Kling AI Motion Brush is straightforward. Below is a step-by-step guide to go from a static image to an animated video.
Accessing the Tool
First, access the Kling AI Motion Brush feature through the Image-to-Video mode. If you’re on the Kling AI platform, navigate to the AI Videos section and select Image to Video. On some interfaces, you might need to ensure you’re using the Kling 1.0 or 1.5 model, since the latest 1.6 model doesn’t include Motion Brush yet.

Uploading Images and Preparing Files
Next, upload the image you want to animate. Click the upload area and choose your file. Kling AI supports common image formats like JPG, PNG, or WEBP (up to 10MB in size). Pick a clear image where the subject you want to animate is visible and not too small.
After uploading, prepare the image for animation. Use the auto-segment feature to find key parts of the image. This saves time and makes animations more accurate. For example, it can detect a person’s outline for easier motion paths. Adjust the brush size for detailed work.
Drawing Motion Pathways
Now comes the fun part – drawing the motion pathway. Select the brush tool and outline the element in your image that you want to animate. This involves “painting” over the object – for example, if you want to animate a cat in the photo, brush over the cat’s body to select it. The selected area might be highlighted in a color (like green for Area 1, purple for Area 2, etc., if multiple areas are used).
After selecting the object, draw a line or curve that represents how you want that object to move. Start the line within the selected area and then drag to where you want the movement to go. The line you draw is the motion path the object will follow in the animation.

Here are tips for realistic animations:
- Balance moving and still parts. Less movement can be better.
- Use the Static Brush to keep some parts still.
- Plan motion paths carefully. The object will follow your path.
- Place the endpoint wisely for natural-looking motion.
Try different path directions and lengths. Short strokes make sharp moves, while long lines create smooth motions. With practice, you’ll create lifelike animations using the Kling AI Motion Brush.
Pro Tip: Need more features? Try DreamluxAI. It’s great for making videos with little effort. Its text-to-video and image-to-video tools work well with Kling AI projects.
Generating and Exporting Videos
After drawing motion paths, you can create your animated video. The Kling AI Motion Brush makes this easy and quick.
Generating Your Video
When motion paths are ready, click “Generate Video.” The tool will process your animation and show a preview. Check the preview to see if changes are needed. You can fix motion paths or adjust speeds if something looks off. The platform works smoothly, even with six moving parts in one animation.
| Feature | Benefit |
|---|---|
| Full HD Video Quality | Makes videos in 1080p for clear, sharp results. |
| Multi-Element Animation | Moves up to six parts at the same time. |
| Fast Processing | Quickly turns images into videos, great for many projects. |
Exporting Your Video
Happy with the preview? Now export your video. Pick formats like MP4 or MOV based on your needs. You can also choose frame rates and resolutions for different platforms. Whether it’s for social media, ads, or personal use, the settings ensure your video looks great everywhere.
If you used a free account or free service, note that Kling AI adds a watermark on free outputs for branding. The watermark might appear as a small logo or text on the video.
In summary, the basic workflow of how to use Kling AI Motion Brush for AI videois: upload image → draw motion → generate → download. Now that you know the basics, let’s move on to some advanced tips to make your Motion Brush videos even better.
Advanced Tips for Using Kling AI Motion Brush
Once you’ve mastered the basics, you can refine your technique to create even more impressive AI videos. Here are some advanced tips:
Making Animations Look Real
To make animations look real, move parts separately. For example, in a busy street scene, give different paths to people, cars, and birds. This makes each part move naturally. Use the Static Brush to keep backgrounds, like buildings, still. This trick makes moving and still parts look more realistic.
Plan how things move carefully. Copy real-life movements by drawing paths in the right direction and length. For example, when animating a waving hand, end the path where the hand would naturally stop. Follow the path closely to keep control. Sometimes, less movement looks better, so balance moving and still parts wisely.
Changing Motion Effects
The Kling Motion Brush lets you change many settings. Make the brush bigger, up to 50px, for detailed work. Use the auto-segment tool to save time. You can animate six parts at once, which is great for busy scenes like sports games. For example, you can animate a soccer ball, players, and cheering fans, each with its own path.
Try different brushes to make cool effects. Use the Motion Brush to make an apple float or create moving shadows for depth. You can move objects by hand or let the tool detect them automatically. These options let you control your animations and match them to your ideas.
Applications of Kling AI Motion Brush
What can you do with Kling AI Motion Brush videos? Here are some popular use cases:
Social Media Content Creation
The Kling motion brush changes how you make social media posts. It helps turn still pictures into fun, moving stories or reels. Animated photos catch the eye on social media. Adding motion makes your posts more exciting and grabs attention. Creators can use Kling AI Motion Brush to make their posts stand out.
Whether showing off a product or telling a story, this tool is simple to use, you can create engaging content regularly without heavy editing software. Influencers and content creators are using it to bring memes, photographs, and digital art to life in creative ways.
Marketing and Advertising
In ads, catching attention is very important. The Kling AI motion brush helps make your ads stand out. Marketers can leverage Motion Brush to add flair to product images and ads. Imagine you have a product photo for an online store – with Motion Brush, you could animate a feature of the product (like a glow on a phone screen turning on, or a pair of shoes that rotate slightly) to create more dynamic videos. This draws more attention than a static image.
Moving pictures also tell better brand stories. Short animated videos can show why your product is great. Adding motion makes your visuals stick in people’s minds. This tool helps you make pro-level animations for better marketing.
Personal and Creative Projects
The Kling AI motion brush isn’t just for work. It’s great for fun and creative projects too. You can animate family pictures to make them special. Imagine a photo of your child blowing out candles coming to life. These animations make keepsakes more meaningful.
For creative ideas, the options are endless. Animate art, make short movies, or design cool greeting cards. The tool’s features let you generate an ai video to bring your ideas to life. Whether for fun or art, this tool helps you try new creative things.
Top Kling AI Motion Brush Alternative: Dreamlux
Looking for another option besides the Kling AI Motion Brush? Dreamlux is a great pick. This smart AI video tool helps you make ai-powered video creation easily. It’s perfect for both beginners and experts, offering features for everyone.
Why Pick Dreamlux?
Dreamlux combines ease and creativity. Here’s why it’s a top choice:
- Text-to-Video Technology: Write your idea, and Dreamlux turns it into a video. No need for hard editing skills.
- Image-to-Video Conversion: Upload a picture, and Dreamlux adds animations to it.
- Fast Video Generation: Create videos in minutes, saving time for other tasks.
- User-Friendly Interface: The platform is simple, so anyone can make cool videos.
- No Watermark Outputs: Generate AI videos without watermarks even in a free trial!
Comparing Key Features
| Feature | Kling AI Motion Brush | DreamluxAI |
|---|---|---|
| Animation Control | Draw motion paths manually | AI creates animations automatically |
| Video Creation Speed | Takes some time | Very quick |
| User Skill Requirement | Needs some animation knowledge | No special skills needed |
| Extra Tools | Limited | Includes templates and text-to-video |
Who Benefits from Dreamlux?
Dreamlux is great for people who want fast, quality videos. It’s perfect for marketers, teachers, and social media creators. Use it to make ads, teaching videos, or fun projects.
DreamluxAI makes video creation easy and fun. Try it now to improve your content!

Conclusion
Using motion brush of Kling AI can turn still pictures into moving videos. You can animate parts of an image with accuracy. It lets you control how things move, making it great for social media posts or movies. This tool makes video creation easy and improves storytelling. Try its features now to make your content better.
Need help? Dreamlux has templates and guides to assist your projects. These tools help you create amazing animations and videos without much work.
FAQ
How do I start using the Kling AI Motion Brush?
First, log in to the Kling AI platform. Go to the “Image to Video” section and pick the Motion Brush tool. Upload your picture and follow the simple steps to add motion to still images. Tutorials are there to help you learn quickly.
Can I use Kling AI Motion Brush for commercial projects?
Yes, you can use it for business projects. It’s great for making ads, promo videos, or branded content. Just make sure to read Kling AI’s rules for commercial use.
What file formats does Kling AI Motion Brush support?
This tool works with JPEG, PNG, and TIFF image files. For videos, you can export in MP4 or MOV formats. These options work well on most devices and platforms.
Is Kling AI Motion Brush suitable for beginners?
Yes! The Motion Brush is easy to use and has auto-detection features. These tools help beginners make animations without needing any experience.
Note: Want an easier option? Try Dreamlux AI’s text-to-video tool for quick results.
How does DreamluxAI enhance my Kling AI projects?
DreamluxAI has tools like templates, text-to-video, and image-to-video features. After animating with Kling AI, use DreamluxAI to add captions, effects, or transitions. This makes creating professional videos simple.
Latest Posts
- Kling AI Censorship: Is Creative Freedom at Risk?
- How to Use Kling AI Negative Prompts for Better Video Outputs
- Hailuo AI Review: The Creative AI Video Generator You Should Know About
- Vidu AI Review: Ultimate Overview, Features, Pros & Cons
- What Not to Add: A Simple Guide to Kling AI Negative Prompts